This article is an essential part for those who are new to Android security. It will help us to have an arsenal of tools required for Android security in one place. These are some of the major topics that we will discuss below:
- Setting up the Android environment
- Installing the tools required for app assessments
- Installing the tools required for assessing the security of the mobile backend
- Installing vulnerable apps
- An introduction to Android Debug Bridge (adb)
- Installing the required tools
We will start with setting up Android Studio, which is required for developing Android apps, and then move on to creating an Android Virtual Device (AVD). Finally, we will install the necessary tools to assess the security of Android devices and apps.
Most of the installation steps shown here are for the Windows platform. If tools are used on other platforms, it will be mentioned explicitly.
Java
Java is one of the necessary dependencies for some of the tools, such as Android Studio and Burp Suite. So, download and install Java from the following link: https://java.com/en/download/.
Android Studio
The next tool to be installed is Android Studio. Android Studio is the official IDE for Android application development, based on IntelliJ IDEA. Eclipse used to be the IDE for Android Application development before Android Studio was introduced.
Android Studio was in early access preview stage, starting with version 0.1 in May 2013, and then entered beta stage starting with version 0.8, which was released in June 2014. The first stable build was released in December 2014, starting with version 1.0.
Download and install Android Studio from the following link: https://developer.android.com/sdk/index.html
Please allocate the RAM based on your available system memory; however, a minimum of 2 GB is recommended.
To create a new sample application, click Start a new Android Studio project. Choose a name for your app under Application name. Let’s name it HelloWorld . Also choose a sample company domain name. Let’s name it test.com. Leave the other options to their defaults and click Next.
Setting up an AVD
To get hands-on experience of most of the concepts in this field, readers must have an emulator or a real Android device (preferably a rooted device) up and running.
Click the AVD Manager icon at the top of the Android Studio interface, this will open the following window. There is one emulator by default, which was created during Android Studio’s installation proces.
Click the Create Virtual Device button in the bottom-left corner of the previous window.Now, choose your device. I chose a device with the following specs, to create an emulator of a small size.Click Next and you will see the following window. If you check
Show downloadable system Images, you will see more options for your system images. We can leave it to the default of x86 for now.
Finally, give your AVD a name and click Finish. In our case, we named it LabDevice.Once you are done with the previous steps, you should see an additional virtual device, select the emulator of your choice and click the Play button to start the emulator.
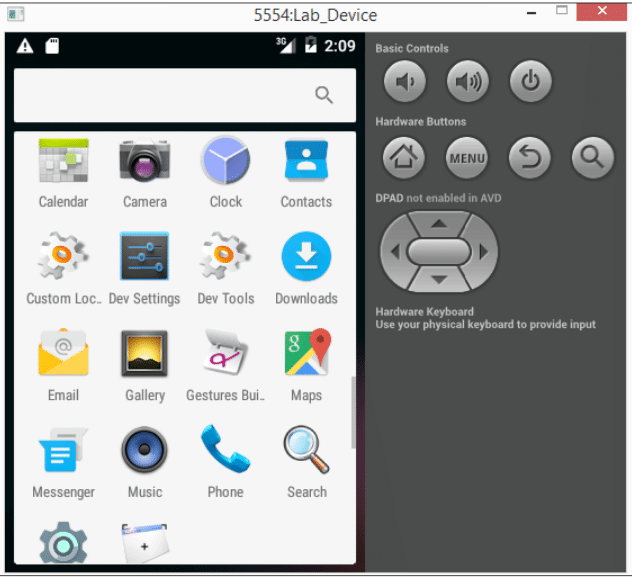
When it’s ready, you should see an emulator, as shown here:
Real device
It is recommended you have a real device along with an emulator to follow some of the concepts shown in this article.
Apktool
Apktool is one of the most important tools that must be included in an Android penetration tester’s arsenal. We will use this tool later for Android application reverse engineering, and for creating malware by infecting legitimate apps.
Download the latest version of Apktool from the following link (please download Apktool 2.0.2 or later to avoid some issues that exist in older versions): https://ibotpeaches.github.io/Apktool/
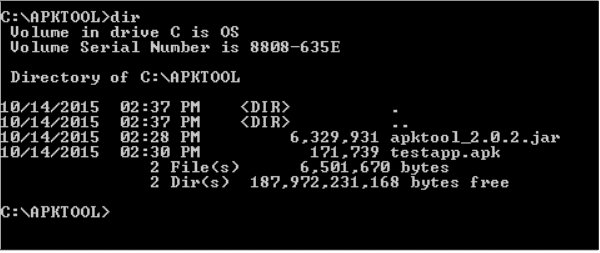
We downloaded and saved it in the C:\APKTOOL directory, as shown in the following screenshot:
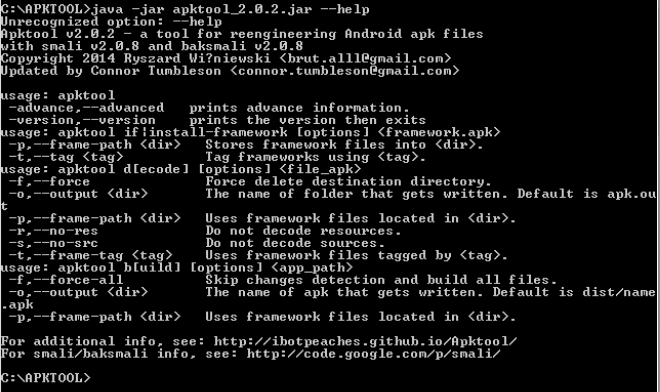
Now, we can go ahead and launch Apktool, using the following command to see the available options: java –jar apktool_2.0.2.jar –help
This completes the setup of Apktool. We will explore Apktool further in future article.
Dex2jar/JD-GUI
Dex2jar and JD-GUI are two different tools that are often used for reverse engineering Android apps. Dex2jar converts .dex
files to .jar. JD-GUI is a Java decompiler that can decompile .jar files to the original Java source.
Download both the tools from the links provided. No installation is required for these tools, as they are executables:
http://sourceforge.net/projects/dex2jar/
http://jd.benow.ca
Burp Suite
Burp Suite is without a doubt one of the most important tools for any penetration testing engagement. Android apps are not an exemption. This section shows how we can set up Burp Suite to view the HTTP traffic from an emulator:
1. Download the latest version of Burp Suite from the official website: http://portswigger.net/burp/download.html
2.To launch Burp Suite, double-click on the downloaded file, or simply run the following command, assuming that the downloaded file is in the current working directory.
3.Now we need to configure Burp by navigating to Proxy Options.
4.We have to click the Edit button to check the Invisible option. We can do this by clicking the Edit button, navigating to Request handling and then checking Support invisible proxying (enable only if needed).
These are all the necesary tools to start doing Android applications as pros does. In the future articles will show you more tutorials on this matter, so deep focused.


